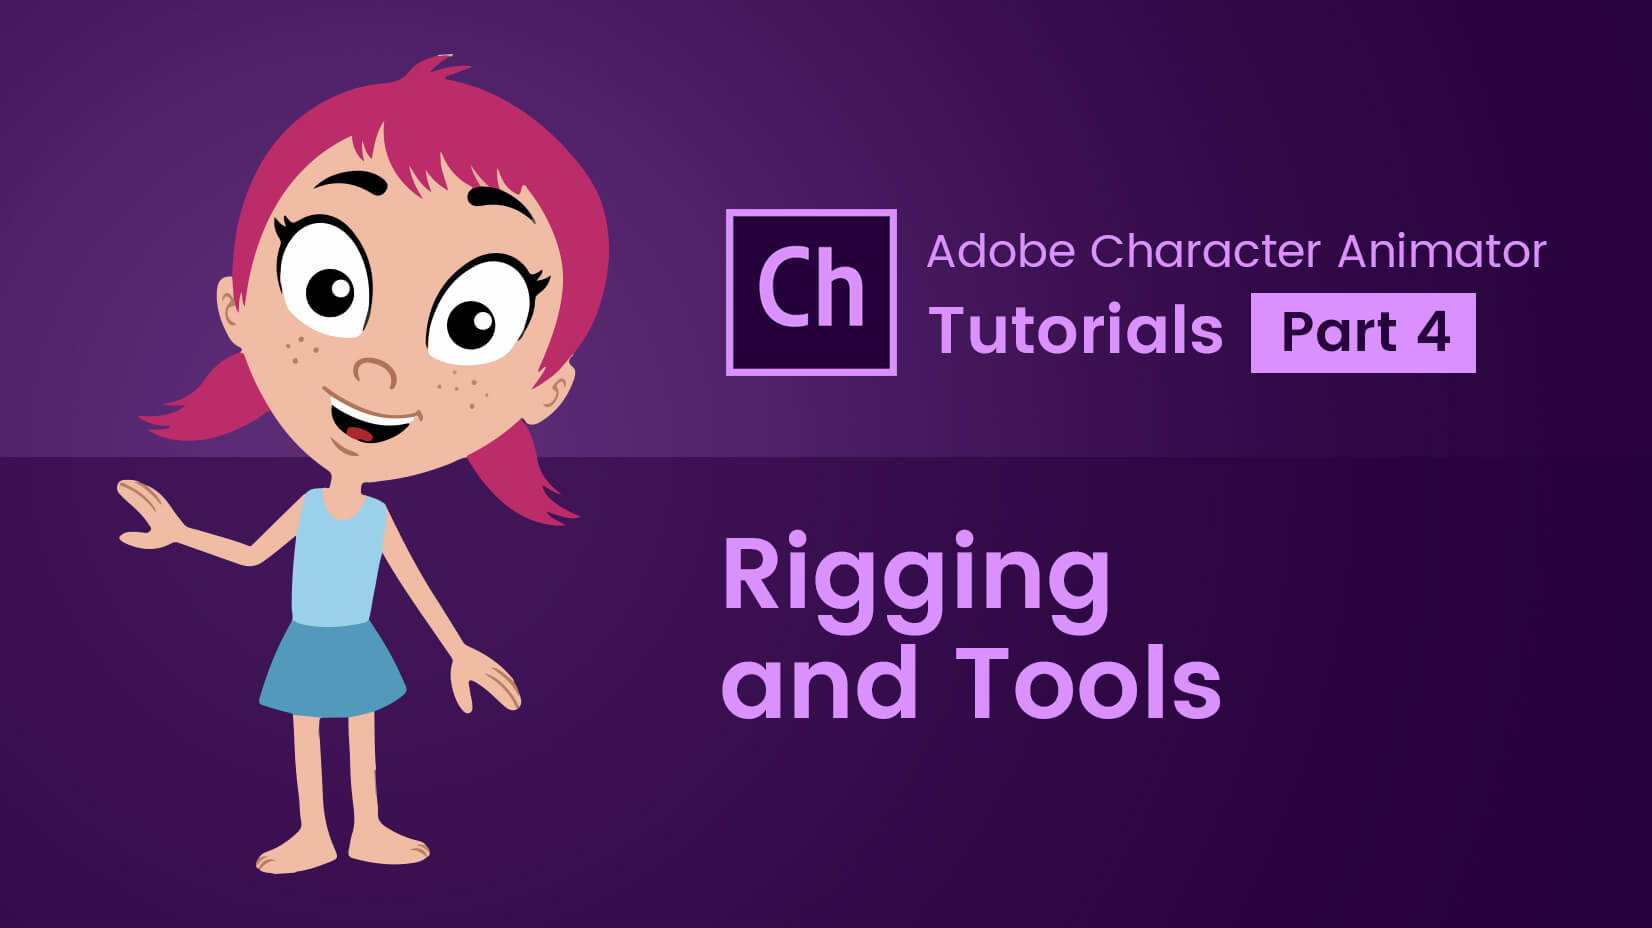
Welcome to the 4th part of our tutorial series that aims to help you explore the incredible Adobe Character Animator. If you follow our series you already know how to create a basic puppet for this new Adobe application. Today, get excited, because we will finally open Character Animator and bring life to your puppet!
In this article:
1. Adobe Character Animator Interface
2. Adobe Character Animator Tools
1. Adobe Character Animator Interface
As I said, it’s time to open Character Animator. Let’s create a new project!

As you can see, it looks pretty much like the other Adobe programs. Now that we have a project, we will import our puppet. You can do that by clicking File->Import and choosing your ai or psd file. And before we start rigging and playing around with our puppet, let’s explore the interface of Character Animator a little bit.

When you import your file you can see it appear in the Project panel on the left. When you double click it, the Puppet panel (in the center) will show your puppet and all of its layers. Above all of this you can see four buttons saying Start, Rig, Record and Stream.
Rig is in blue because right now we are in Rig mode. To see your character move you need to be in Record mode. To transport your puppet to that mode, click on the Add to New Scene button at the bottom of the Project panel. Otherwise your puppet will not appear in the Record mode.
As you can see, after clicking Add to New Scene, the Record mode turns on automatically. You can see your face in the Camera & Microphone panel. At first it has this darker vignette, but when you double click on it the program should find your face and show these red dots on it and blue dots on your pupils.
In the Scene panel you can see Vicky, our puppet, following my head movements. You can see the automatically recognized facial features, that we talked about last time – the eyebrows, the pupils, the blinking and the mouth shapes, also appear. Vicky has all of these functionalities and all we did was arrange our ai / psd file properly! We will see how Character Animator recognizes these features back in the Rig mode, but first let’s explore the interface of the Record mode.

The Project panel on the left is still visible. You can see under the Vicky puppet icon a small clapper board icon has appeared indicating that now we have a scene in the Record mode. We have our Scene panel in the center, with Vicky ready for action and below, buttons for recording. Below all of this you can see the Timeline panel, where you will be able to edit all of your recordings. Remember, to be able to control your puppet, it’s timeline has to be selected. The bright blue color indicates that right now it is selected. When it’s not, the color is green.
Below my face in the small screen you see a webcam icon and a microphone icon, that are in blue. This indicates that they are both on. On the right, below the Camera & Microphone, you can see the Properties panel, this shows all of our puppet’s behaviors. We will talk about all of these in a later part of this series. Now let’s go back to the Rig mode!
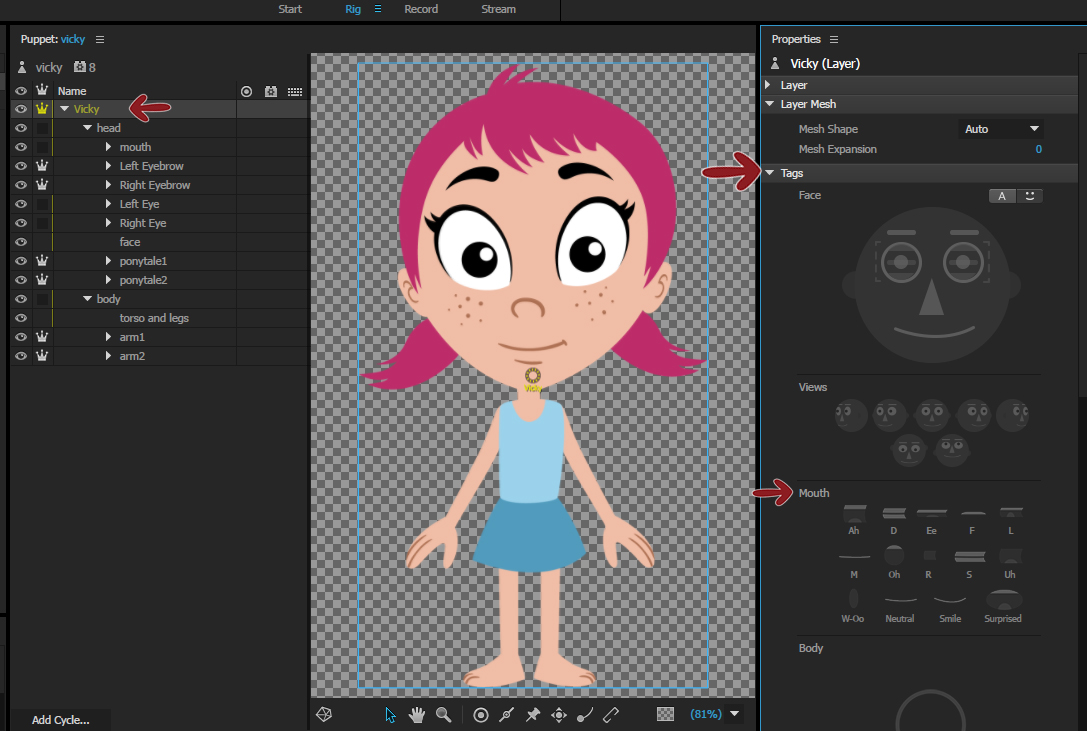
By clicking on your puppet’s main layer (the one with the small crown and your character’s name) you will open its properties on the right. When you open Tags you can see a head with all facial features and also the panel with the different mouth shapes, that we saw in our previous tutorial. On the image below you will see how Character Animator has tagged all the different facial features according to their names.
But first let me mention that little crown again and what does it mean. Basically the + symbol we used in Illustrator/Photoshop turns into a little crown icon when the puppet is imported into Character Animator. The crown means that this body part is independent.

2. Adobe Character Animator Tools
Now we will check out the tools and see what can we do! The first three (Selection Tool, Hand Tool and Zoom Tool) do what they do in the other Adobe programs, so nothing new there. You can also zoom in and out by percentage, at least for me, it’s the easier and more intuitive way. If your puppet has a coloring that will merge with the default background, don’t worry, you can change it.

More interesting are the specific Character Animator tools that will help us give more abilities to our puppet. Maybe you noticed in our little video preview that Vicky was floating in the scene, her feet were not attached to the ground. To fix her feet we will use the Pin Tool.

Pin Tool fixes your puppet to a specific point. Mostly it’s used to attach feet to the ground but you can use it whenever you need to fix a part of your character. In this way the puppet will still follow your head movements but it’s feet will stay fixed on the ground.
Next, let’s make Vicky’s hands move! First we need to use the Staple Tool.

This tool is used for attaching independent puppet parts to the rest of the body. We will use this tool to attach the arms of Vicky to her torso. The difference between the Pin Tool and the Staple Tool is that the Pin tool fixes a point to a certain position and Staple tool attaches parts to the whole.
Before we continue with the next tool, let’s first change the origin point of Vicky’s head and her whole body. This will make her movement more natural.

Notice how at first her head was deforming and her body moved weirdly! By changing the origin point of these elements, Vicky starts to move more naturally. It’s a good idea to put the head’s origin point where it is connected to the neck, because this way the head will pivot from that point. I put the body’s origin point where the belly button should be.
Let’s continue with the next tool.
Now the arms are attached to Vicky’s body, let’s make them movable by the mouse (or touch). This will happen thanks to the Dragger tool.

What this tool does is add a handle to a certain element and make it movable by the mouse or touch.
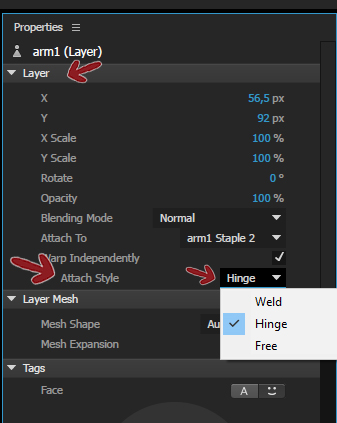
After using the Dragger Tool, I went to the Properties panel (in Rig mode) and I have changed the attach style of the arms from Weld (which is the default) to Hinge.
For arms I usually use Hinge because it allows the arm to move fully up and down without deforming.
You can play around with these attach styles and find out what works best for your character.
Right now the arms don’t look bad but they don’t feel very realistic, they have no structure. But don’t worry! We have the perfect tool to fix that. That is the Stick Tool.

With this tool you can create a so to say ”bone structure” of your puppet. It creates lines, that stay invisible but prevent the puppet bending in certain parts.
There you go! Now we have really nice looking arms. Keep in mind, as I demonstrated, when using the Stick Tool you can not cross two sticks. You can use this tool also on the body and legs, if your puppet requires it, but in Vicky’s case, that’s enough. Let’s continue with the Dangle Tool.

This tool adds physics to an independent element, that means the element will sway and dangle while the whole moves. It really helps bring your puppet to life! Let’s try it with Vicky’s pigtails.
First, I used the Staple Tool to attach the pigtails to Vicky’s head. After I used the Dangle tool you can see a soft sway when she moves her head. The Dangle tool can be used not only on hair, but on different clothing and jewelry.
The final tool I will show you today is the Handle Tool.

This tool adds a handle to your puppet, that could be assigned tags and be used by different behaviors.
The Behaviors you can use to further animate your puppet are a vast topic, that is why the following few tutorials will go through each Behavior and help you learn how to use them effectively.
Till then, this basic Vicky puppet is available for you to download and experiment with!
Click here to download the Vicky puppet.
Continue with more Adobe Character Animator tutorials: