![How to Make an Infographic in Less Than 5 Minutes [Step-by-step Tutorial]](https://i.graphicmama.com/blog/wp-content/uploads/2020/02/26144724/how-to-make-infographic-tutorial-120x70.png)


Watercolor design is a big trend right now. The unique and beautiful qualities of watercolor are used in many design solutions, such as packaging, web, stationery, and others. There are many free and premium resources on the web, varying from high-res photos of watercolor textures, patterns, and elements to vector files, offering even more design possibilities.
In this tutorial we will show you how to create your own vector watercolor texture from scratch, you will learn how to create different watercolor elements by hand, and how to convert them from raster to vector image in Adobe Illustrator. It is super easy, and fun, and you get to create exactly what you need for your design vision, without depending on other sources!
We have also prepared a free download file with the PNGs and .ai source of the watercolor elements in this tutorial. So let’s get started!
Create watercolor textures and elements
First, you need to prepare some materials for your work with watercolor:
- Paintbrushes – oval and flat
- Watercolor paint
- Watercolor paper (the paper we are using is 180 g/m2, which gives you a good texture and absorbs water quite well)
- Pencil and eraser
- Handkerchiefs
- Water cup

Step 1 – Working with an oval brush
In this step, you will make different shapes, with single and mixed colors, using an oval paintbrush. Take the brush and dip it into the cup with water generously. Take just a little bit of color and start making shapes on your paper. The rule is, that the more paint and less water you have on your brush, the more saturated color you will get. The less paint you apply with the brush, using more water – the lighter and more airy the colors will be:

Then start mixing with other colors and always add a little bit more water, while the paper is wet so that the colors mix well together:


While the color you just applied is still wet, don’t be afraid, experiment, and add a drop from another color. That will create a nice splash:

Step 2 – Remove excessive paint
If you added too much water, or you just want to achieve a cool, washed-out effect, take a handkerchief and gently tap on top of the paper. The paper will absorb the excessive paint and will leave its own texture mark:

Your watercolor pattern is ready! Leave it to dry out, scan it, or take a high-res photo of it and we will work with it in Adobe Illustrator later:
Step 3 – Working with a flat brush
If you want to create a pattern with smooth edges and borders, rather than painting ovals, then use a flat paintbrush. Use less water, so your contours remain smooth and crisp:

Step 4 – Create various elements
Once you get comfortable with the watercolor by painting textures, backgrounds, ovals, splashes, and rectangles, the fun part begins! Use your imagination, go wild and draw whatever you want: flowers, hearts, leaves, … – we leave it to you to fill in the dots! Here are some examples of our shapes and experiments, that you can get for free as watercolor vector textures and elements. You are welcome!
Download the Watercolor Texture and Elements


Create your own text with a watercolor effect
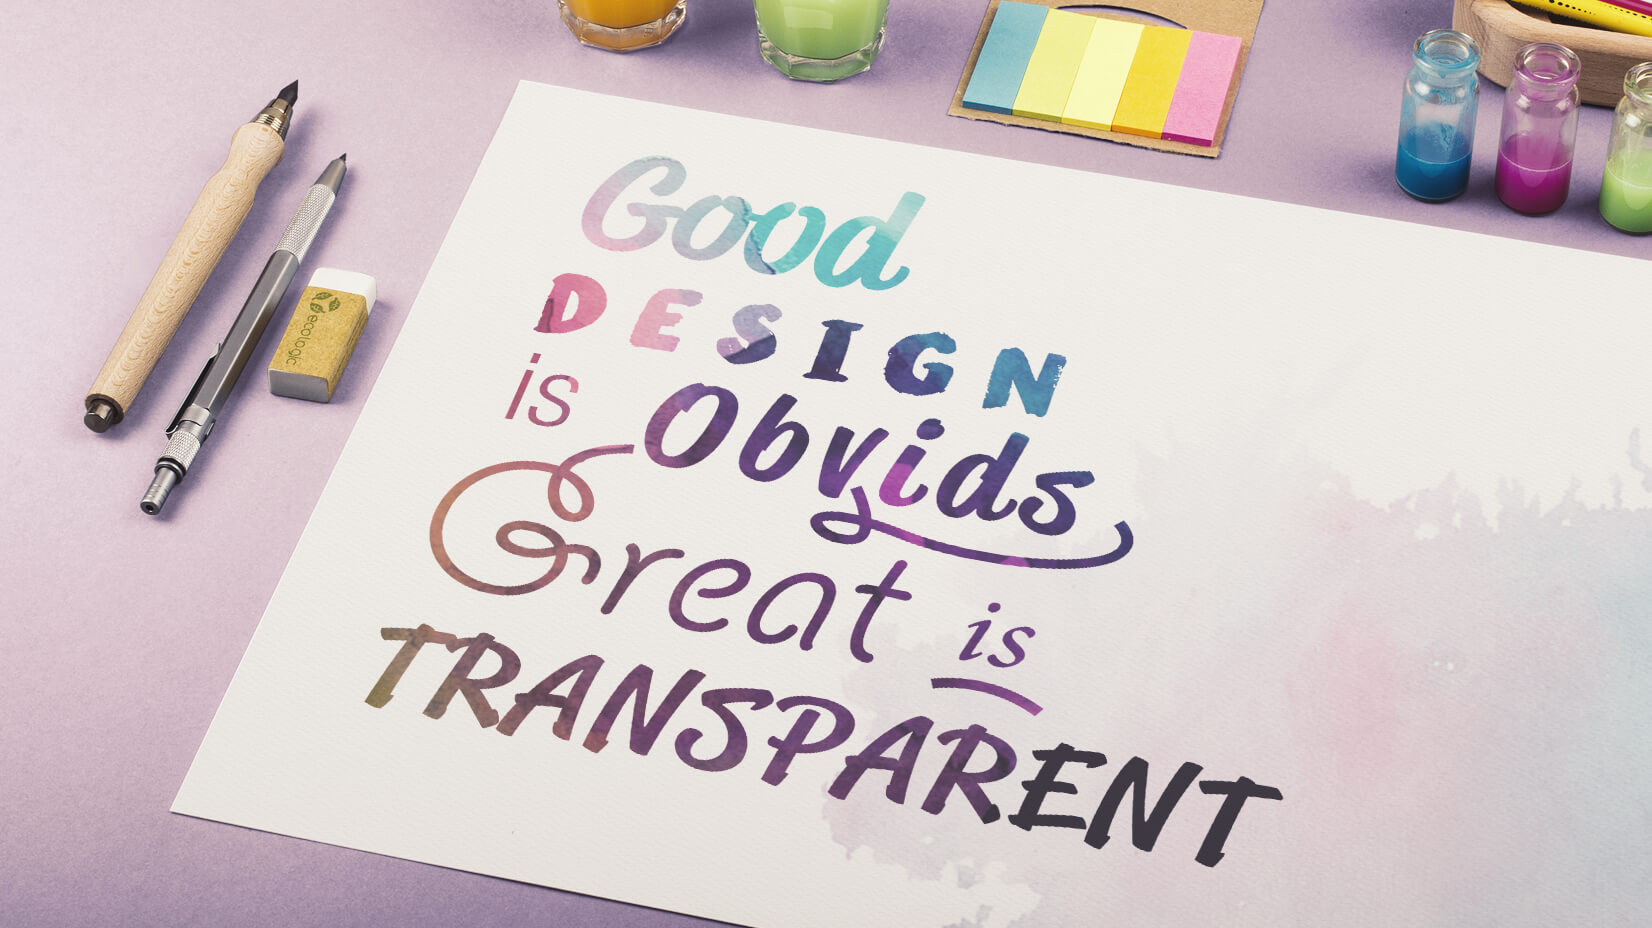
There are many free watercolor resources and if you need inspiration or to use ready once, check our article on the topic. But if you have the time, or you haven’t found what you need, then we have one more surprise for you – we will show you how to create your own simple text with applied watercolor effect! It is super easy to do. Let’s see how. If you are uncomfortable with hand lettering, try and sketch out some ideas with a pencil first. Don’t worry right now about the arrangement of the letters and the scaling, because we can easily change that in Photoshop. Well, we picked a quote we like about the design and wrote it down with marker on a plain, ordinary sketchbook paper:

Scan all your materials and prepare the files
We hope that you had fun making watercolor textures and elements and that you liked hand-lettering! Now leave all your watercolor to dry out and scan it (or take high-res photos).

Then, open your scanned files in Adobe Photoshop and duplicate several layers of your scan. That way, you can cut each element out from the rest of the scanned image and export it as an individual PNG. It is handy to keep these designs in separate files!

Select one of the watercolor textures you made with Lasso Tool (L) and go to Select > Inverse – this will select everything else, but not the texture you just marked. Now press Delete and everything you don’t need right now will disappear. Press Ctrl+D to deselect.

You can go to Image > Adjustments > Hue/Saturation if you want to play a little bit with the colors. Under the same menu, you can adjust also contrast and the like. Try, experiment, and see what works for you best. Use the Magic Wand Tool (W) to select some white spaces left and delete them.

So far so good – you are done with one of the elements, export a PNG from its layer, going to File > Save As. Repeat the same steps for the rest of your element designs. When you are ready, we will move on to importing them in Adobe Illustrator, so we can finally create our vector watercolor texture and elements.
Note, that if you don’t have a scanner and you prefer to take a photo of your works, you might face a problem. Sometimes, your background won’t be completely white, but you can easily fix that in Photoshop. Just open the image, go to Image > Adjustments > Levels and carefully move the sliders, so the gray spots from your background disappear. Try moving the gray slider a bit to the left, and the white slider a bit to the right.
Here are all the elements we created, with adjusted colors and removed white backgrounds:

Create your vector watercolor texture and elements
Step 1 – Preview your texture and elements
Import your watercolor texture and elements into Adobe Illustrator and open Window > Image Trace. For Mode, select Color, and for Palette, select Full Tone. Then press Preview. You will have to wait a bit to render.

If you want to reduce the file size of your vector watercolor texture, then in Pallete drop down, instead of Full Tone selected Limited. This will give you a more vector, simplified look of your watercolor and your file will drop in size:

Step 2 – Trace your image after the preview
Once happy with how the image looks, make sure Preview box is checked off – this will allow you to click the Trace button. After tracing, you only have to go to Object > Expand and there you have it – your very own vector watercolor texture and elements! Don’t forget to remove the white background of your image by selecting it with Direct Selection Tool (press shortcut A) and pressing delete. Save you vector watercolor. Here is what your vector watercolor texture should look like before the save:

Create your vector watercolor text
You haven’t forgotten about the text we created, have you? Well, we haven’t! Let’s get our hands on it.
Open the scanned image of your text in Photoshop and use the Magic Wand Tool (W) to remove the white background. Select the different words with Lasso Tool (L), right-click and choose Layer via Cut. This will bring your selection to a new layer and you will be able to move the separate files around easily and scale them independently. We ended up with this rearrangement of the lettering:

Now repeat the same actions, as for the textures to convert your PNG text image into a vector text. Don’t forget to Expand it and delete the white parts. The new thing is, that after you’ve done the steps you learned, you have to select your text, and go to Object > Compound Path > Make.

After that, in the layer panel, move your text above the vector watercolor texture, which you have opened in the file as well:

Select the two, and hit Ctrl+7, which will create a Clipping Mask. This means, that the vector watercolor texture will cut with the outlines of your text, like here:

We hope you liked this tutorial, let us know what you think, by dropping a line or two in the comment section below! We would love to hear from you!
You may also be interested in 23 Drawing Software Options to Become Digital Picasso.