


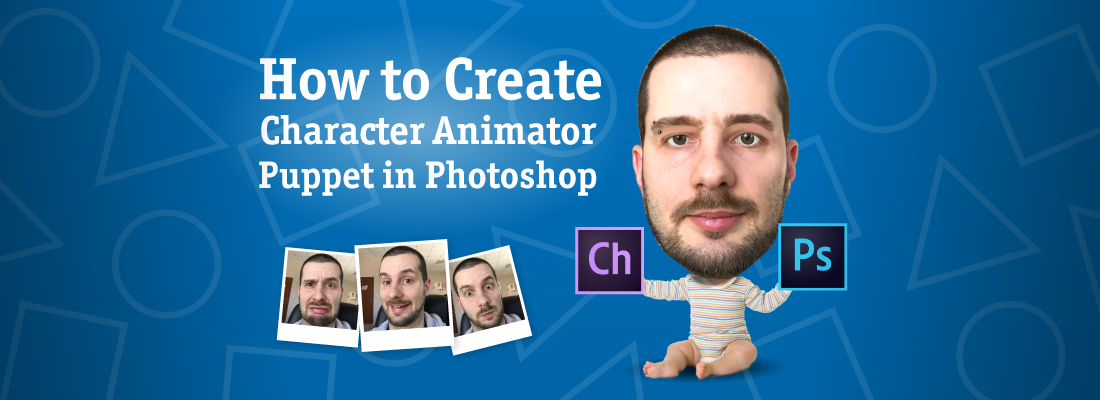
Who said you need to have drawing skills to make your own perfectly good and unique functional puppet for Adobe Charterer Animator? If you are sick of Illustrator tutorials and want to learn how to create Adobe Character Animator puppet in Photoshop specifically, then tutorial is for you. If you are still unsure what this whole “puppet” buzz is about, check out this article.
Today, we will show you how to turn yourself into an awesome Adobe puppet by using your selfies and your Photoshop skills. Ready to create lots of fun videos with yourself as a protagonist? Cool, let’s begin!
1. Selfie session. Time to get crazy, people!
Use your smartphone, tablet, or another device of your choice to make a series of selfies. These photos will determine the overall look of your future puppet.

 Here are 5 super handy tips before you roll your sleeves to shoot:
- Make yourself a list of the facial expressions you’ll have to make for your puppet. This will help you stay focused and will eliminate the risk of skipping an essential pose.
- It’s recommended that you photograph the facial expressions corresponding to the postures the software requires. Furthermore, you can experiment with even more crazy faces to boost the fun factor of your puppet.
- Try to keep your head in the same position as much as possible in all your selfies.
- For the best results, keep your face well illuminated. Direct light is recommended. It will make your facial mimics the most expressive.
- Use green screen behind you to crop your head in Photoshop way more easily.
The facial expressions that we did were in accordance to the software’s requirements. Remember that you will later have to name your own mouth expressions by following this same list (Ah, D, Ee, F, L, etc). This way you will allow Character Animator to detect them correctly when you animate your puppet.
2. Photo hunting for your puppet’s body and accessories.

The fun with learning how to create Adobe Character Animator puppet in Photoshop doesn’t stop at making crazy faces in front your camera, no! Release your wildest imagination to come up with unique ideas and make your puppet super cool and fresh. Here at GraphicMama we love having fun and mocking ourselves, so we picked a couple of baby photos to use for the puppet’s body, and a pen as an accessory.
Make sure your photos are royalty-free. We recommend that you use the services of a specialized website for premium or free stock photos. Otherwise, carefully check the licence of the photos you are using or simply make your own photos for the body and accessories.
3. Heat up your Photoshop and take out the scissors.
Once you are ready choosing and shooting pictures, it’s time to open up your Photoshop. We are starting off the actual building of your puppet. At this point it’s essential to equalize the light levels of the different photo shots and also even out the color saturation, so your puppet looks good in the end.
What you have to do is cut out all needed visual elements from your photos: face, eyes, eyebrows, accessories, body, etc. Also, have in mind that you will have to equalize the element sizes, e.g. all head positions should be proportional with one another.

4. Time to build your puppet! Arrange and name your PSD layers.
At this point you will put the final touches of your soon-to-be puppet in Photoshop before sending it to Character Animator. This step is vital for the software, so it can detect your puppet parts correctly.

In order to successfully create Adobe Character Animator puppet in Photoshop, you should arrange your layers and name them by following Character Animator requirements. Make sure your visual elements fall into the folder they belong. Also, if you have a background, you should remove it. Alright, now we are ready to move on!
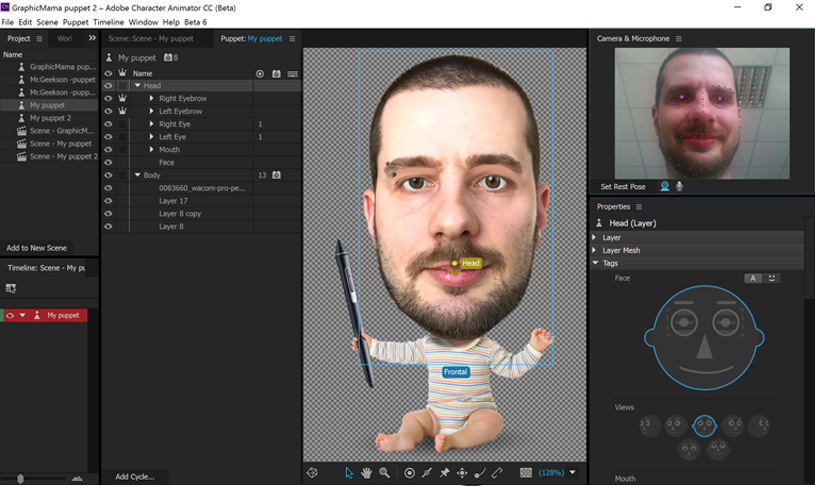
5. Import your PSD into Adobe Character Animator.
If you arranged and named your file correctly, Character Animator will automatically detect which elements correspond to your specific mimics. The software will instantly start animating your puppet by mirroring your camera movements.
6. Let’s shake it! Adjust the body behavior.
Use the software tools and functions to make the body move. In our case, we made the hands and legs draggable with the mouse while the neck is fixed. At this point, you can also add key triggers with the keyboard for specific actions, e.g. hold the pen. You don’t need to record the body movements while you animate the head. You can later blend the video layers together and adjust them via the timeline.

7. Mastering the timeline.
Let us clarify first that once your puppet is well adjusted and the software recognizes all its parts, everyone can animate it! The software wouldn’t need your face in particular to detect the camera facial expressions. This means, you can create Adobe Character Animator puppet in Photoshop by using someone else as a model, or have someone else animate your own puppet for you.

Secondly, you don’t need to do the head animation, the body movements, and the voice-over at the same time. Record them separately and use the timeline tool to adjust the different layers so they can blend together and shape the final animation.

8. Export and voila!
Character Animator gives you the options to export the outcome as a gif or a video by using Adobe Media Encoder. The choice is yours but it also depends on where you will use the final result. We’ve made two different puppet animations and exported them as videos. Scroll down to check them out.


Final results:
We bet you’ve had fun with this tutorial. We surely did. 🙂 Hope you feel inspired and fueled with ideas. The next time someone says it’s impossible to create an Adobe Character Animator puppet in Photoshop, you know what to do. Show them this tutorial, or better off – your own results. By the way, we would also love to see your results. Why don’t you brag a little bit in the Comments section below?
Anyway, now you are ready to create your first puppet for Adobe’s motion capture software and you can find the additional elements you would need here:
43 Free Adobe Puppet Templates – If you want to save time and use premade puppets, this is the right article for you.
46 Backgrounds for Adobe Character Animator scenes – having a puppet on a white background is not enough these days. You can find some great backgrounds for your scenes in this article.