 Another way to bring the duplicated rectangle over the ellipse is via the Layers’ Panel. Simply click on the Floor Mask layer, then drag and drop it right above the Floor.
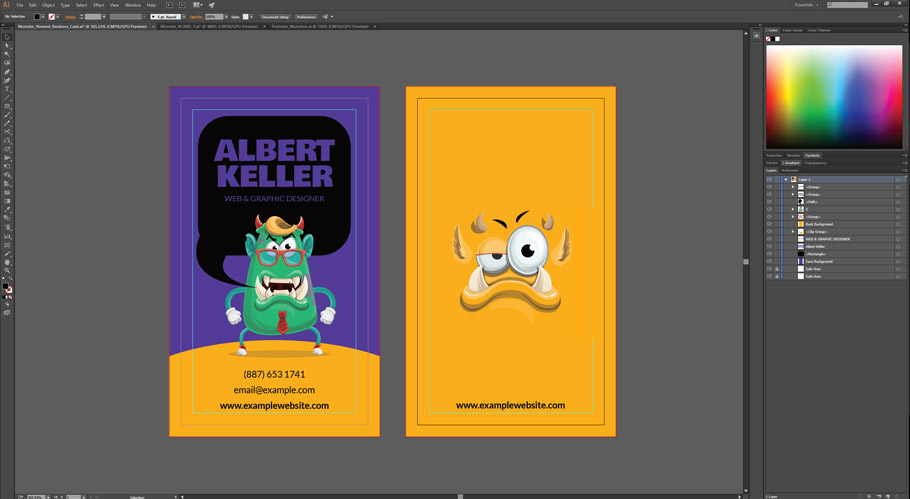


![How to Make an Infographic in Less Than 5 Minutes [Step-by-step Tutorial]](https://i.graphicmama.com/blog/wp-content/uploads/2020/02/26144724/how-to-make-infographic-tutorial-120x70.png)


![]()
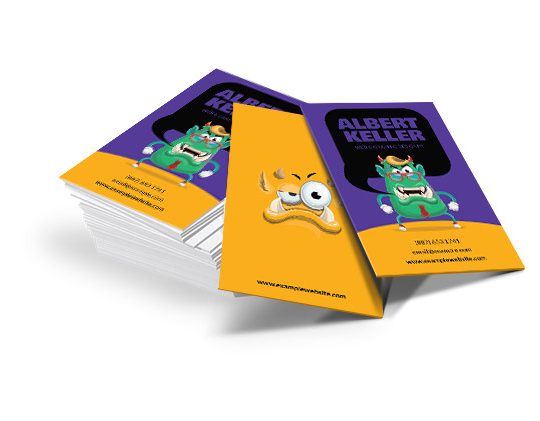 In this tutorial, we will create a playful, full-bleed, print-ready monster business card template. We’ve decided to go for a monster theme with this one but feel free to use any other resource from our website according to your taste. It will fit just perfectly, we guarantee!
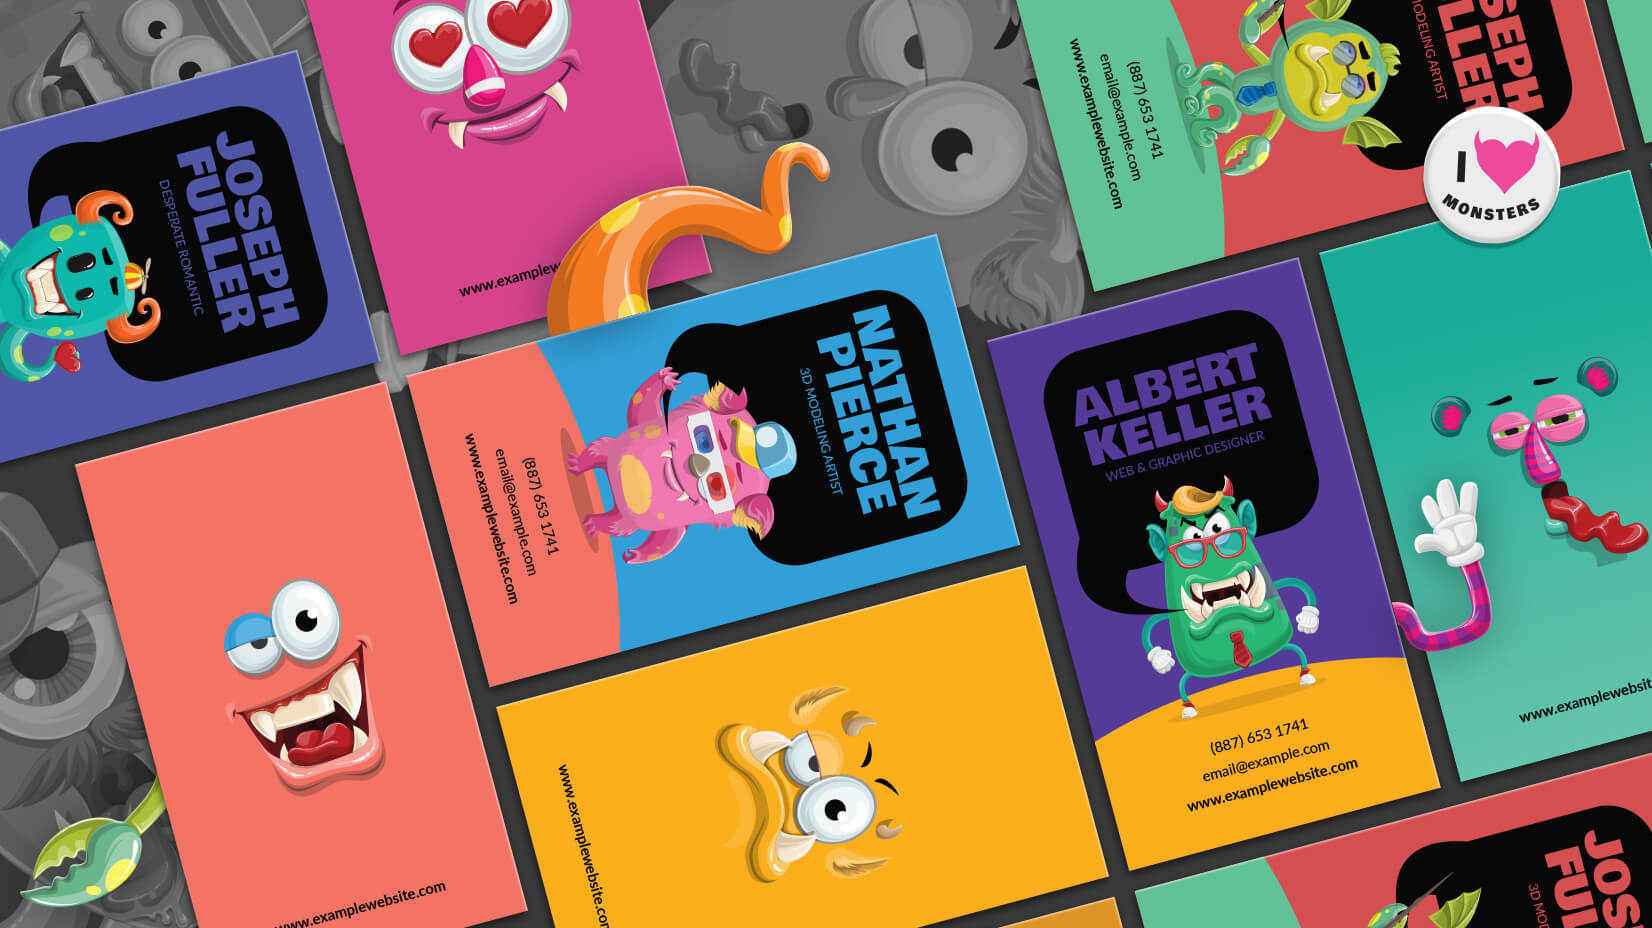
To spice up things a little bit, we will give you two monster graphics from the Cartoon Monster Clipart Bundle for free!
The source files and the monsters are available for free download at the bottom of this page, so keep reading.
First things first: Creating the Document.
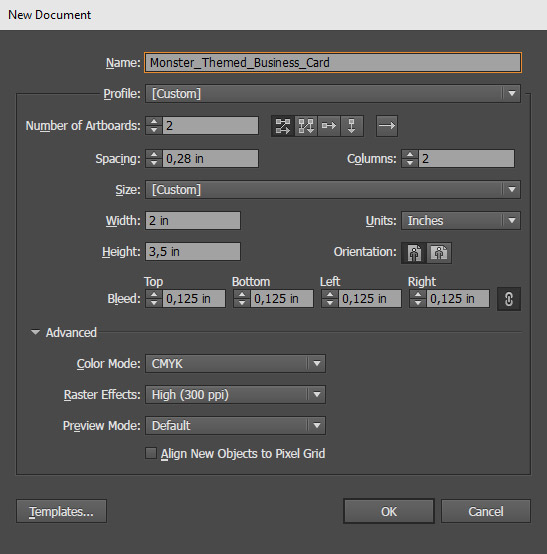 To make the monster business card template funnier and more unique, we’ll make it vertical. Also, it’s going to be in a standard US size, which means: 3,5 by 2 inches with 0,125‘ bleed on each side. Let’s go ahead and create a new document in Adobe Illustrator.
Since we want a two-sided business card, we are going to set the number of artboards to 2: one for the front and one for the back of the card.
Select inches as units for measurements. Set the width to 3,5′ and the height to 2′ and don’t forget to switch the orientation mode to vertical.
Set the bleed to 0,125′ for each side of the artboard.
In the Advanced tab set the Color Mode to CMYK and Raster Effects to 300 PPI.
If the full bleed and print-ready terms don’t ring any bells to you, you might want to check our guide on How to Make a Business Card Template With Bleeds in Adobe Illustrator first.
Safety Comes Second. Only in this case.
Now that we’ve set the bleed in the New Document window, our monster business card template is safe and secure on the outside. You are never really fully safe from blades and cutting machines, though. We need to provide some room for imperfections in the trimming process on the inside of the business card, too. Usually it’s the same size as the bleed zone: 0,125′ in our case – US standards, remember? Let’s go ahead and create that safe area. Only then our document will be ready for the design process.
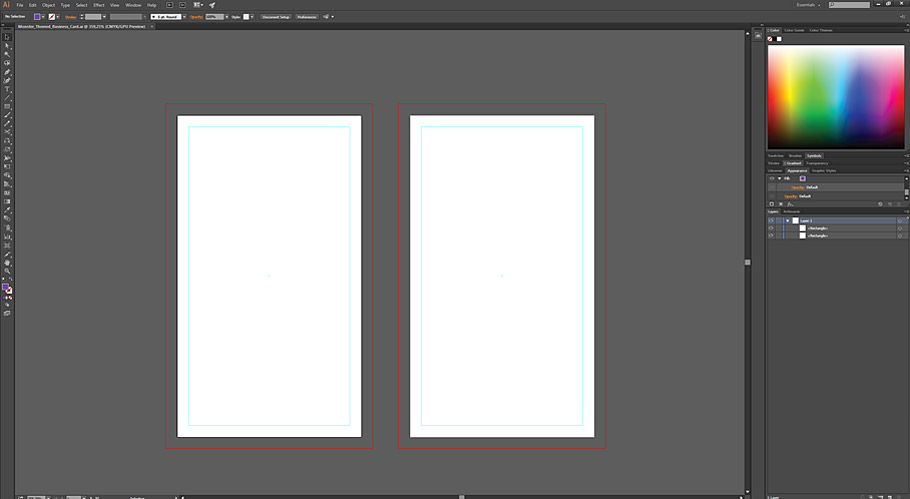
- Select the Rectangle Tool (M) and click anywhere on one of the artboards.
- Set the width to 1,75‘ and the height to 3,25‘.
- Position the rectangle in the center of the artboards by clicking on it and selecting Horizontal Align Center and Vertical Align Center from the align options at the top. You can also access these options by going to Windows -> Align.
- While holding down the Alt / Option key, drag the rectangle over the other artboard to create a copy of it, and then repeat step 3.
- Select both rectangles, right-click on one of them and select Make Guide from the context menu.
There you go! Our document is ready for real fun. We have our bleed (red outline) and our safe area (cyan outline). We are going to put all the important stuff inside the safe area, so it won’t get damaged in the trimming process. The background, which has to go all the way to the edge of the business card, should entirely fill the bleed area to ensure that no white edges will be showing on the card after it has been trimmed down to its actual size.
The Fun Part! Designing the Monster Business Card Template.
So far, so good. The technical (boooring…) part of this tutorial is over and we are about to start designing our monstrous card.
Nice-Looking Background Color
Our first step of the design process is to set some background colors. For the face of the card, we’ve picked the very pleasing to eye purple color. Some call it “Gigas”, and others call it #543B97. For the back of the card, we will go for the bright, sunny color #F9AE1C.
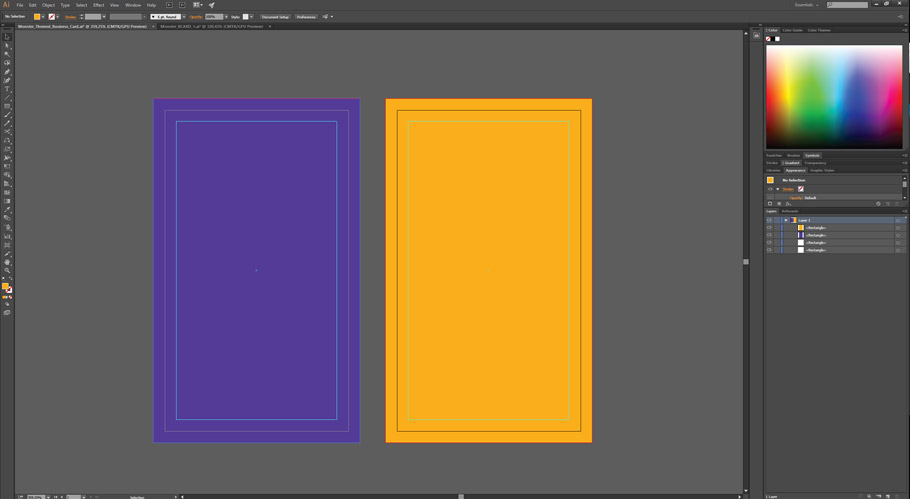
- Select the Rectangle Tool (M) and make a 2,25 by 3,75 inches rectangle in one of the artboards.
- Position it in the center of the artboard and fill it in purple. You don’t really need to follow this strictly. Experiment with colors if you wish.
- Drag the rectangle over the other artboard by holding down the Alt / Option key to duplicate it and position it in the center. Fill this one in yellow.
A “Floor” for our Monster to Stay on.
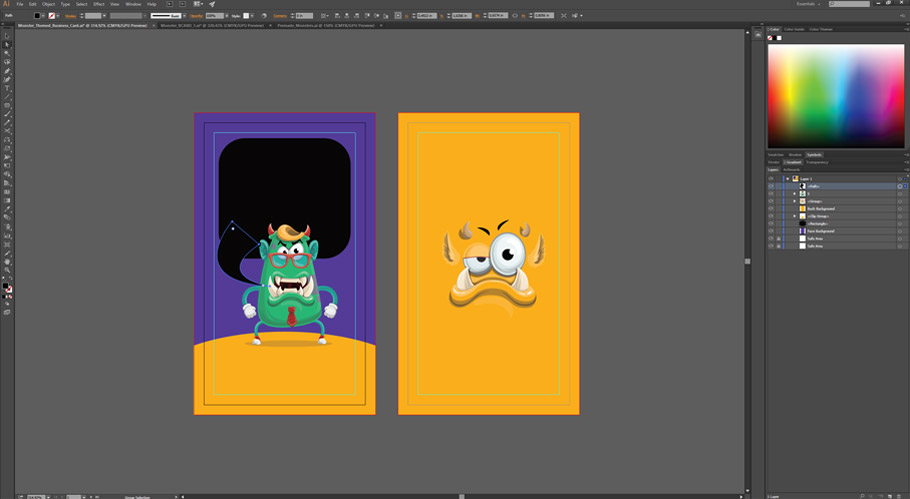
We don’t want our monster to just float in a purple abyss so we want to create some surface to put it on. We will refer to it as a “floor” but it’s just a yellow ellipse, really.
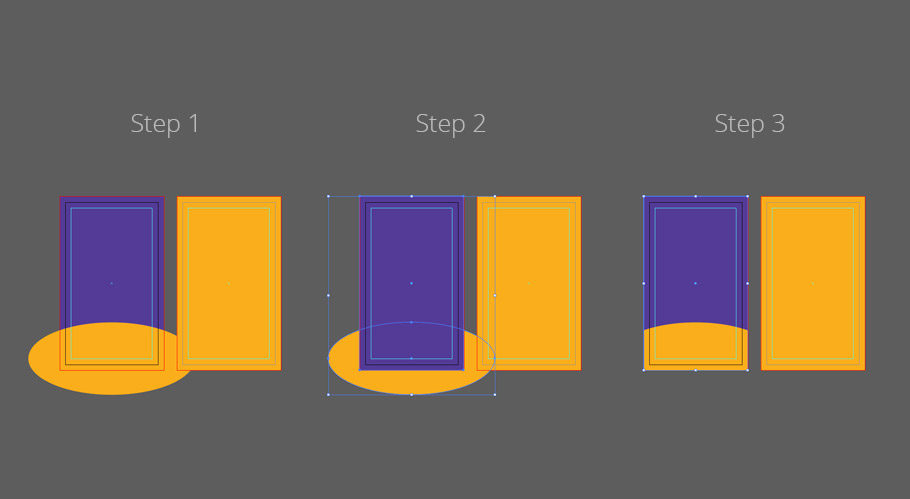
- Grab the Ellipse Tool (L) and create an ellipse similar to the one in the picture above. We will refer to this ellipse as a Floor.
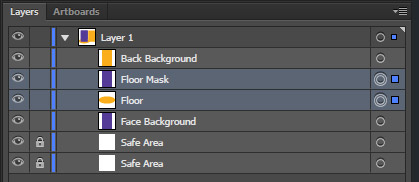
- We have to apply a mask to our Floor so it doesn’t exceed the size of the purple background. Make a copy of the background shape with Ctrl / Command + C and then place it in the exact same position on top of the old one. Do so by pressing Ctrl / Command + F. The copy of the background is going to serve a purpose as our mask. We are going to refer to it as a Floor Mask. The reason we are duplicating it is the following: once we use it as a mask, it will turn invisible. Now, bring the Floor Mask over the Floor by clicking on it and pressing Ctrl / Command + ]. This key combination would bring the selected object to the front, overlapping one element at a time. This step is essential because the element we would be using as a mask has to be right above the one that is actually going to get masked.
 Another way to bring the duplicated rectangle over the ellipse is via the Layers’ Panel. Simply click on the Floor Mask layer, then drag and drop it right above the Floor.
 - To apply the mask, select both layers and go to Object -> Clipping Mask -> Make or just press Ctrl / Command + 7.
Bring the Monster into the Game
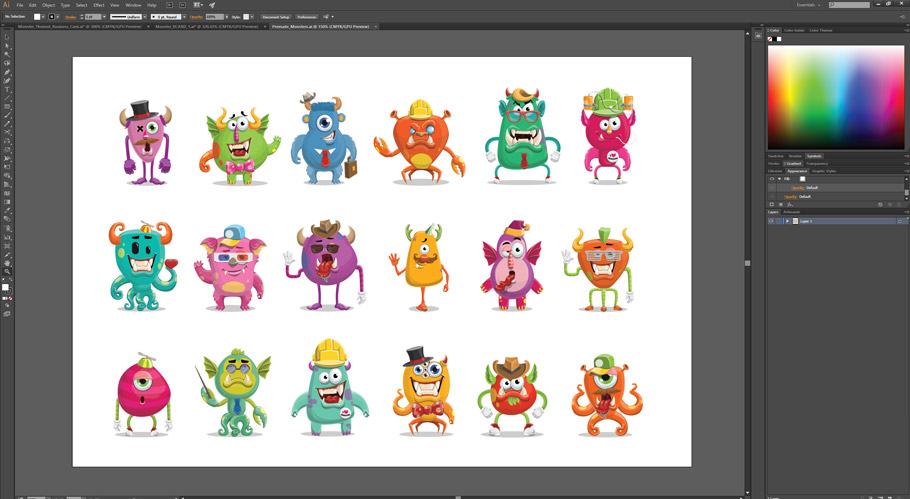
Now that our monster business card template has a solid ground for our monster to put its feet on, it’s time to bring him into the picture. Get our Cartoon Monster Clipart Collection and pick the one you like the most. You can always use something else, though.
Simply copy the monster you like and paste it on the monster business card template document or…
- Go to File -> Place if you want to import a file from your computer.
- Navigate to the vector file or image, uncheck the Link checkbox and then click Place.
- Click anywhere on the artboard to place the graphic and position it near the top of the Floor. We will later add some text below our monster.
For the back of the monster business card template, we will be using a Monster Avatar from the same creation kit. If you need to recolor your avatar, check out this video by Adobe.
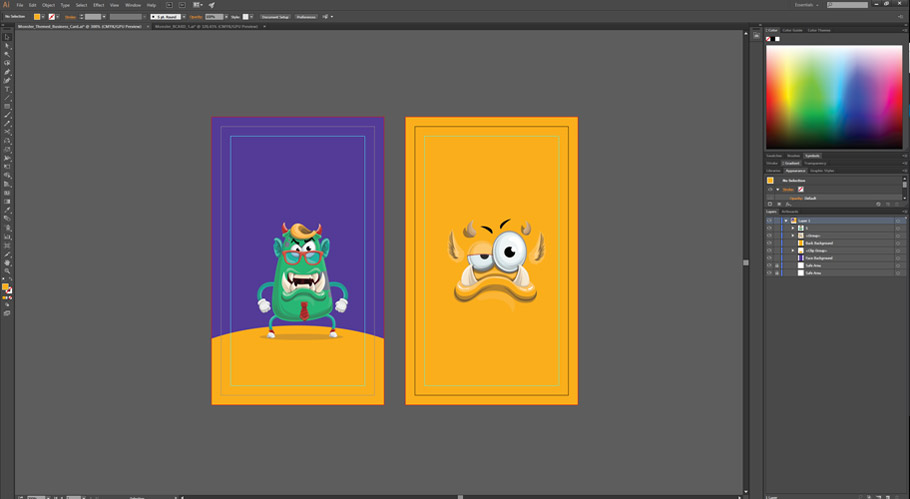
Our business card has already started to look pretty monstrous, right?
All The Important Stuff
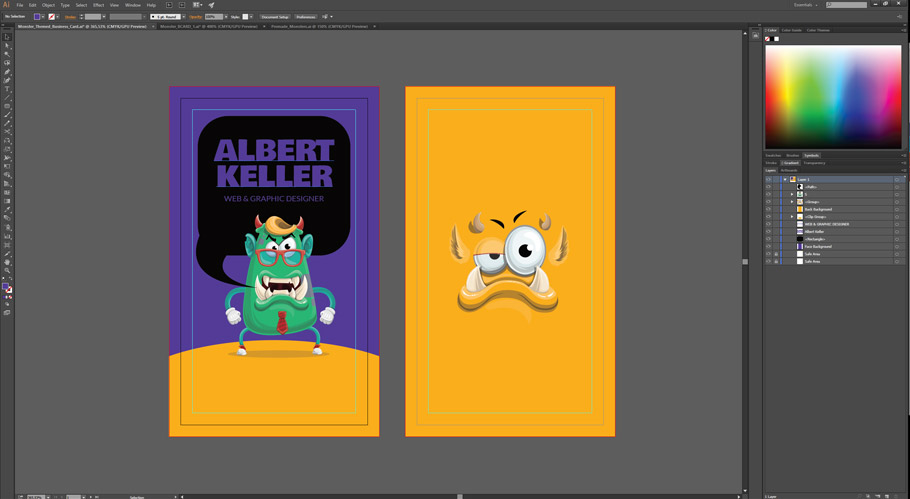
Everything is almost set and done. The only thing we need to add, is our monster’s name, occupation, and contact details. Then, we’ll throw in a couple of graphic elements and give it a finished look.
Speech Bubble
Albert’s name is going to be placed inside a speech bubble. For this purpose, we will be using the Rounded Rectangle and Pen Tools.
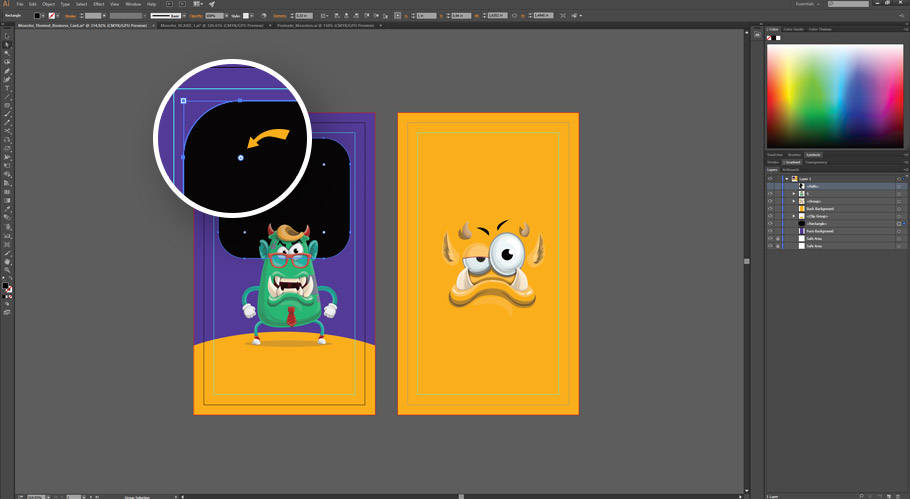
- Creating the round shape is easy-peasy-lemon-squeezy. Select the Rounded Rectangle Tool (no shortcut, sadly). Click and hold the square-looking icon in the tools panel. The Rounded Rectangle Tool should pop up. Now that you have selected it, click near the center of the artboard, and while holding down Alt / Option + Shift keys, drag to the side to create a perfect square growing from its center.
- Select the Direct Selection Tool (A) and click on the rectangle you’ve just created. Four small dots should appear near every corner on the inside of the shape. Grab one of them and drag it to adjust the border’s radius.
That was easy but now comes the part with the tricky Pen Tool. It may look pretty hard to use but it’s not actually. Once you get the hang of it, you will love it. Explaining how it works with images is quite hard, though. It would be easier for you to understand it by seeing it in action. This is a pretty good tutorial on the subject.
Once our irregular shape is ready, the next step would be to position it over via the Layers Panel or via the shortcut combination we used earlier – Ctrl / Command + ]. We don’t really NEED to do this but it looks cool, so why not.
Name and Occupation
Our speech bubble is ready. Now, we need to add Albert’s name. In this example, we are using the Bowlby One font family for the name and Lato for the subtitle and contact information. We’ve picked these two but can use any fonts you’d like.
- Select the Type Tool (T)
- Click anywhere on the artboard and enter the name you want to be displayed on the front of your business card.
- Set the font family to Bowly One.
- Set the font size to 22pt (in our case). Longer names may require you to lower this number so that they would fit in the chatbox.
- To change the default text color, select the Direct Selection Tool (A). Then press I on your keyboard to select the Color Picker Tool and then click on the purple background to select its color.
- Position the name in the speech bubble and repeat the steps to add the occupation’s subtitle.
The only thing that’s left, is the contact information. Be careful! Your texts must not exceed the safe area.
Our monster business card template is now ready! It’s colorful, funny, and engaging at the same time. Print it and have fun! Don’t give this to your employer if you are interviewing for National Security, though.
Download The Files from this Tutorial
(The two monster graphics are included!)
You may also be interested in this related article: The Top Online Business Card Makers in 2022