STEP 1: What is trendy right now?
 STEP 5: Which ones will get to the finale with a whole set?


Ever wondered how we come up with our cartoon characters? Well, here is your chance to peek backstage and get an idea of how the whole inventive process of creating a cartoon character design goes from A to Z.
Behind the realization of any cartoon character design stands a well-thought-out concept, a lot of discussions, analysis, and important decisions so that we can make our ideas come to life in the best possible way. So, let’s not waste a minute more! Here are GraphicMama’s 10 steps to making any cartoon character design concept a reality!
 STEP 1: What is trendy right now?
Way before we even start pondering on the cartoon character design, the first step of the creative process would be to conduct thorough keyword research and find out what kind of characters people are actually looking for. Using the GA Keyword Planner Tool gives us an idea of what is in demand at the moment, what we might be missing in our collection of characters, and what would draw interest.
STEP 2: Which subject should we choose?
Now that we have the research’s results in our hands, the next step would be to go through them and discuss each one. Picking a subject out of the keyword results is not an easy task. We have to weigh the pros and cons of all of them, the potential they have, and then decide on a particular subject. In this case, we agreed on illustrating wizards.
STEP 3: How will the characters look like?
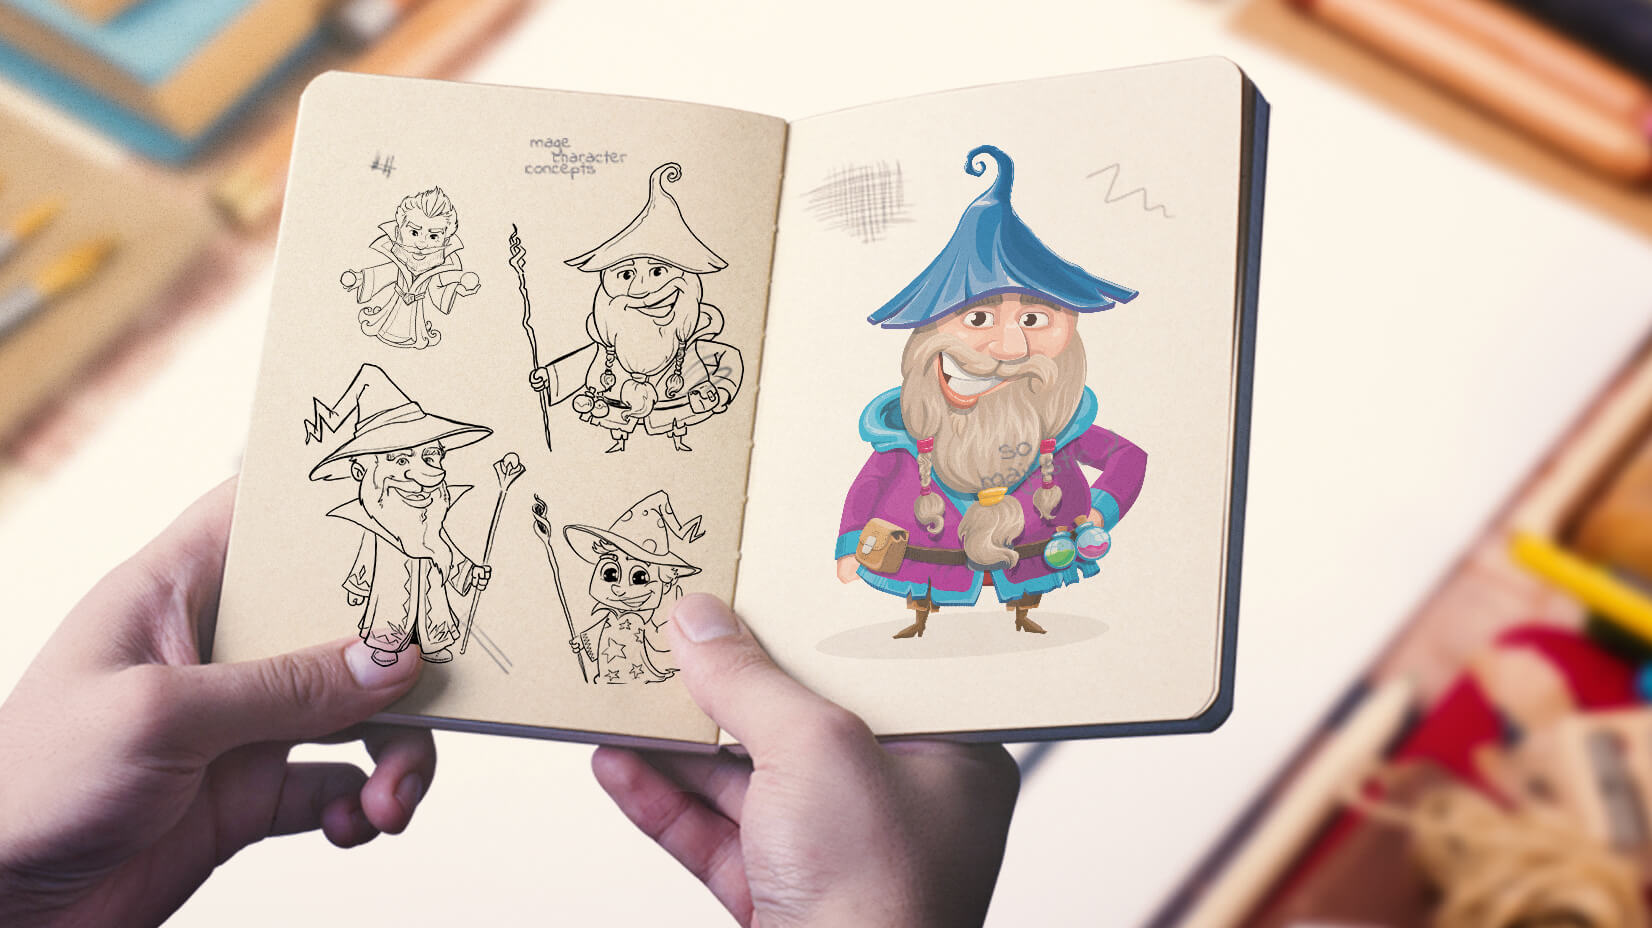
The fun begins! We’ve got the idea in our heads and now it’s time to make it happen. At this point, we would develop several design concepts corresponding to the keyword’s search results. Usually, the mock-ups are more than the characters we plan to release so that we‘d have enough rough material to work on. Here’s what our 12 concepts of wizard characters looked like at this stage.

STEP 4: Which designs do we love the most to vectorize?
Now, the next step would be to sift out the best cartoon character design mock-ups which would undergo a sketch-to-vector transformation. To identify our favorites out of all, we would thoroughly analyze our characters’ concepts and search for these essential qualities:
- individuality,
- a clear concept,
- a good presence,
- well-defined features,
- uniqueness,
- positive connotations and more.
Also, they should be practical, and functional and should easily fit into other designs. In this particular case, we agreed on vectorizing 6 wizard concepts. Here’s how the sketch-to-vector magic happened:
 STEP 5: Which ones will get to the finale with a whole set?
After vectorizing the drawings, we go through them once again and decide which ones will make it to the end with a whole set of poses. The rest don’t go in the trash though! We usually release them as freebies so that you can still enjoy them.
Concerning the wizard characters, we kind of missed this step. All six concepts we vectorized had such different vibes and unique individualities that eventually we published them all with full sets.
STEP 6: How many custom poses and what will they look like?
Time to think about what makes these particular characters tick. What are their typical tools and equipment? Which are their most favorite items?
At this step, we would conduct thorough research of, generally, everything that outlines their personalities and makes them who they really are. Then, we would outline a plan for the set so that we can come up with some awesome conceptual poses for the specific type of characters, along with the typical must-have poses they come in.

STEP 7: Which accessories are unique and typical for these characters?
So, the process of creating the character’s set of poses includes the actual drawing of the specific items that will make the set unique, complete, and distinguished. Check out some of the conceptual items that we created especially for the wizard characters: wands, potions, magical tricks, and more.
STEP 8: How does the whole set come to life?
This is the step where we prepare and finalize the set. This process includes arranging the character’s poses in a particular way that corresponds to their names so that we can achieve a well-organized and nicely presented set in the end. For this purpose, we use a special plugin that automates the whole process. Here is just a part of the final result:

STEP 9: How are the characters called?
It’s time to personalize our still unnamed cartoon cuties. Generally, all GraphicMama characters are friendly, smiley, and could fit into a large variety of projects and designs. Although, each one of them has its own name and nickname, story, and personality that makes them unique.
Here is how we named our powerful wizard characters:
STEP 10: How do we optimize and export the final set?
For the final touches, we’ve developed our own special plugin which makes the whole process of optimization, upload, and export much easier. When we have all the final poses, this custom plugin takes each one of them and adjusts it in accordance with GraphicMama’s specifications for size, file formats, software compatibility, etc. This is how the process of optimization goes.
For the final export, we use a web service which we’ve developed ourselves, as well. This service is responsible for the final file preparations so that when you hit the “Download” button, it gathers just the right files corresponding to the particular pose or set and delivers them compiled in a convenient small zip.
…and voila!
This is how a cartoon character goes from our minds right into your hands. Not a simple process for sure, but hey, it’s all worth in the end, right?
In the meantime, as a continuation of this article, why not expand your knowledge and also check out The Basics of Character Design Process: Insights and Examples.